New Co-Broker Feature: Saved Search – spend less time to search for listings and make your clients happy!


"I wanted to send my client new listings to review - now I'm already in bed because it slipped my mind during the day..."

Many of you have probably experienced this before or heard another agent mention it - time passes so quickly and what you had in mind to do for the day may have slipped two seconds later because you've received a call or were otherwise kept busy.
Well, fear no more as today PropertyScout will show you the time-saving feature that'll make your life so much easier!
Create an account to get started
Before you're able to save your desired searches, you need to sign in with your existing account or sign up with a new account. Below we explain the sign-up options available for you to get started.
Sign-up using email and password
You can sign up with your email account and your own password as seen in this image. Make sure your confirmed password matches.
Sign up with Google, Facebook or Line
As you can see above, you can also choose to sign up using other methods such as Google, Facebook, or Line. We recommend you to set up the account with one of these options as you'll not need to remember your password.
How do I know that my sign-up or sign-in was successful?

If you are logged out or do not have an account, this is what the top right of the screen will display. Please proceed as mentioned to get logged in

Once you either log in or create an account from scratch, you will now see an icon with an arrow, signifying a drop-down menu, like this.

In the drop-down menu for your account, you will see the option to view your profile, your saved search results, and to sign out.
Starting saving time - set up your property search
Now that you have an account and are logged in through any of the aforementioned methods, you will be able to proceed with saving your search results, continue reading for more detail.
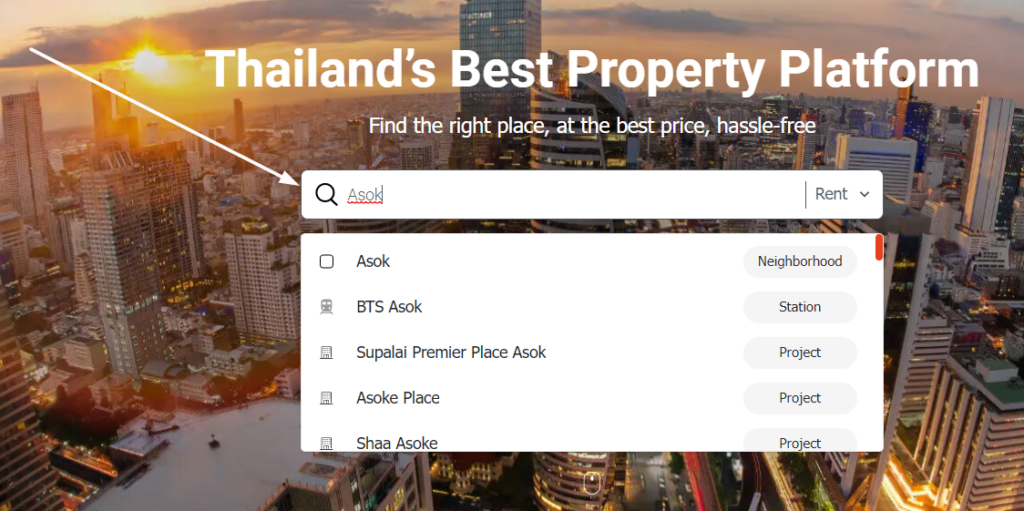
Locate the search bar on any website or platform (or, in this case, the PropertyScout website) and type in the name of the area you would like to look for a property for sale or rent in.

Once you have decided and finalized your search query, hit the "Search Now!" button to begin searching.
Your initial Results
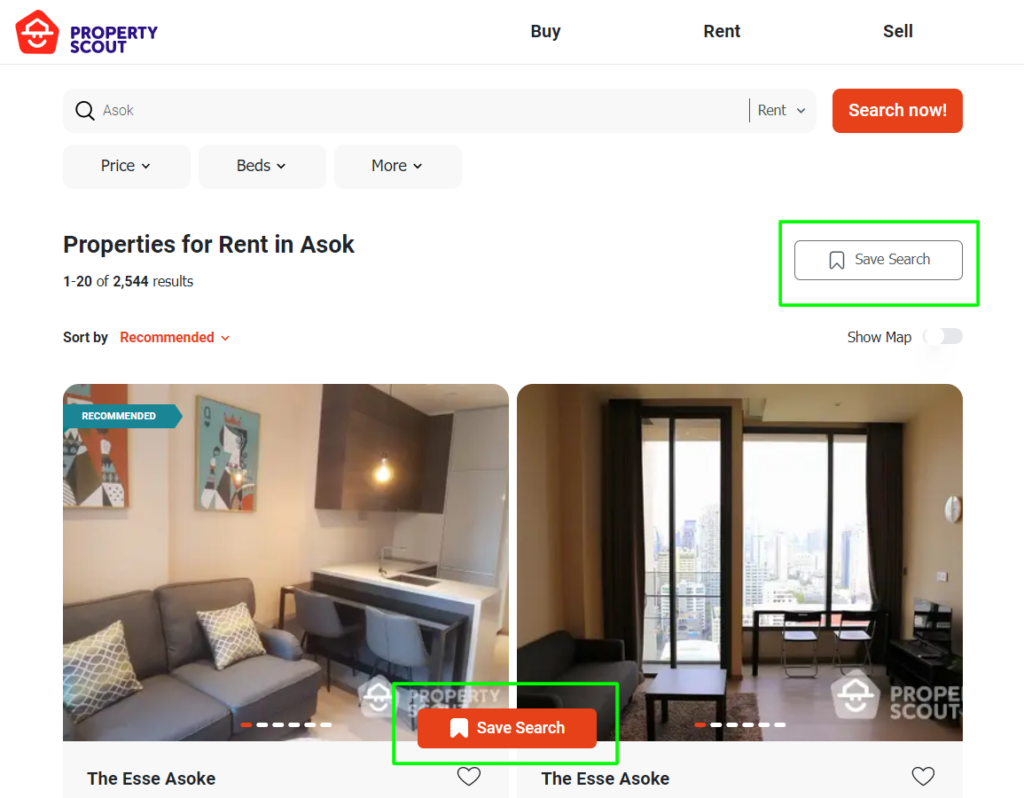
Your results page will look like this, if you do not include any additional specifications.
Specifying your results
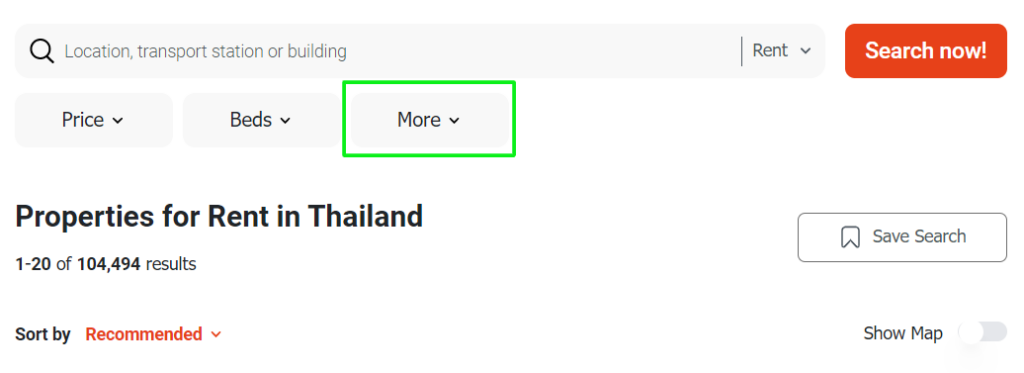
If you would like to specify your property search results some more, however, you have the option to click on the drop down "More" menu for further settings.
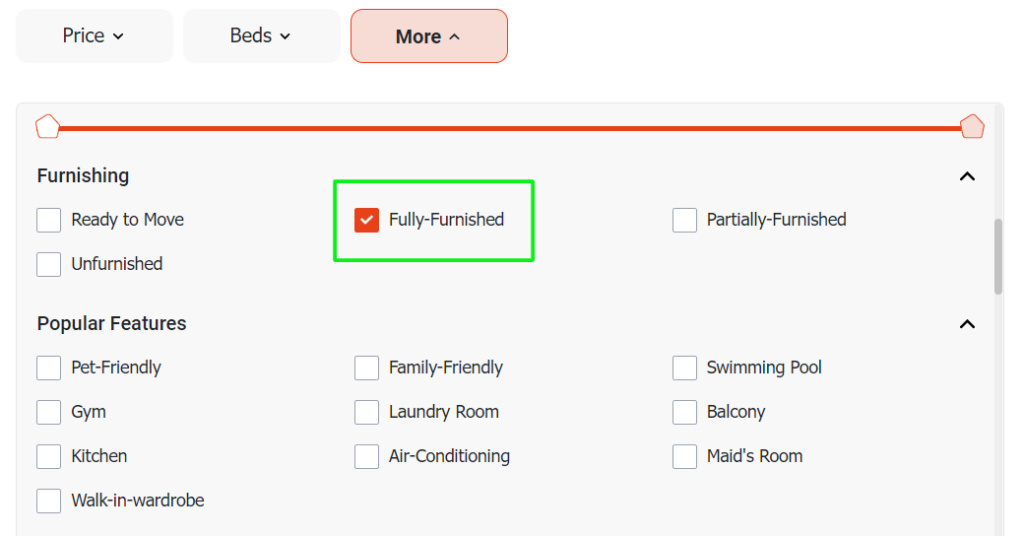
For instance, if you would like to specifically search for properties which are fully-furnished, click on the "Fully-Furnished" checkbox.
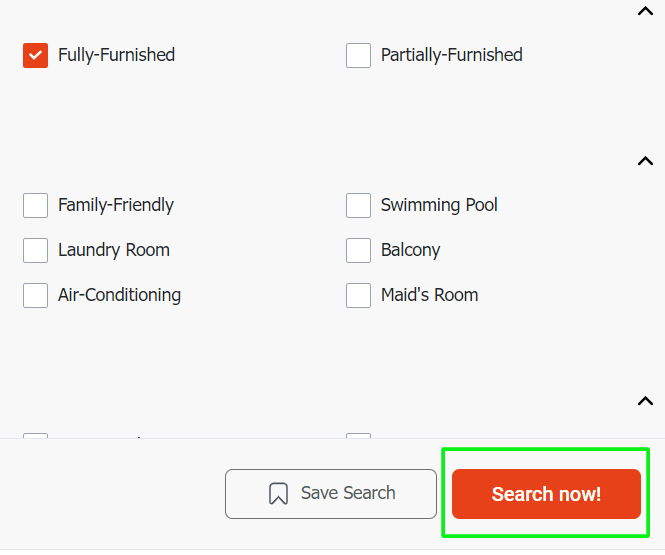
Once you have all the additional specifications to your search query that you would like, click the "Search now!" button to begin searching again.
Specified Results
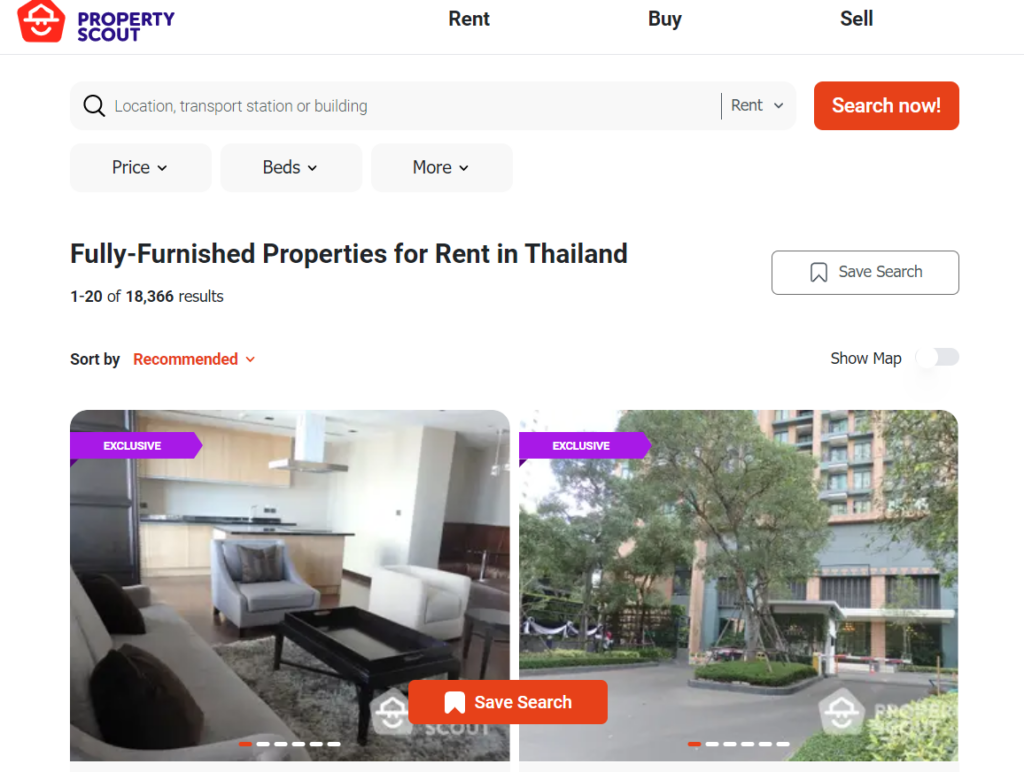
With all the additional specifications applied as you would like, your search results page will now look like this. In this case, you will now see more specific properties which are fully-furnished.
Saving your search
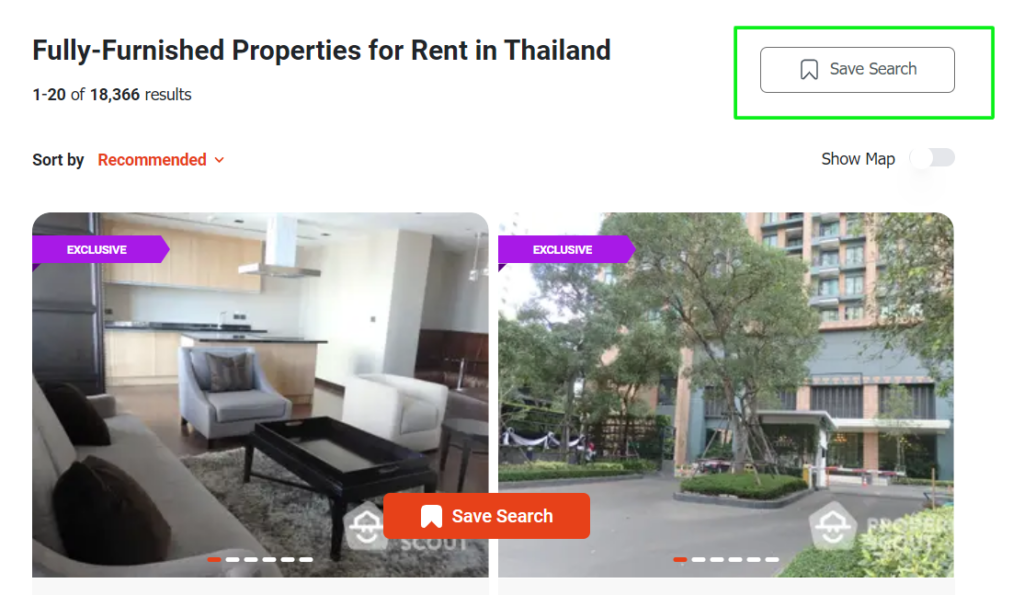
If you would like to save your search to keep track with new additions, should you return and continue searching again, click on the "Save Search" button as seen here.
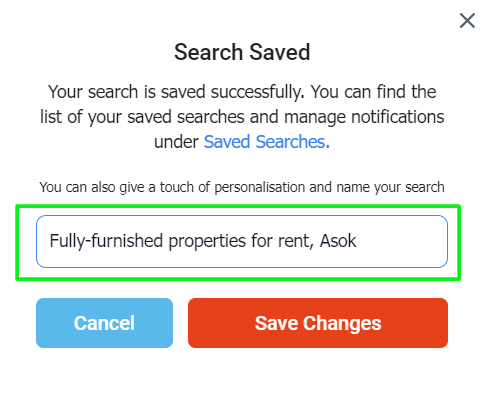
Once you have clicked on the aforementioned "Save Search" button, you will then see this option which allows you to customize your saved search result so it would be easily recognized. Simply name your saved search result as you would like. In an agent or co-broker's case, you could also name your saved search after your client and/or their phone number for memorization convenience.
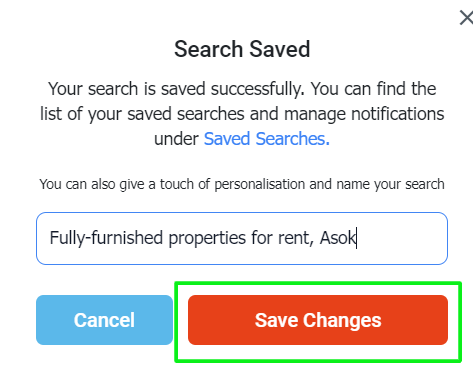
After you have named your saved search result, click "Save Changes" to completely save your search results.
Accessing your saved search results
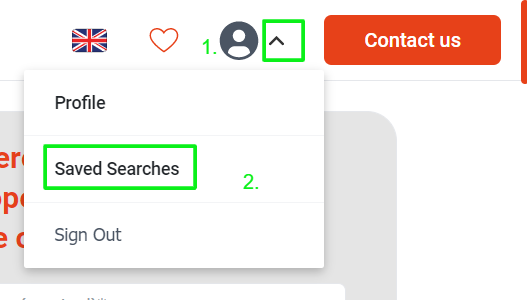
In order to view your saved search result(s), follow these two steps:
- Click the drop-down menu on your profile.
- Look for the "Saved Searches" option and click it to access your saved search results.
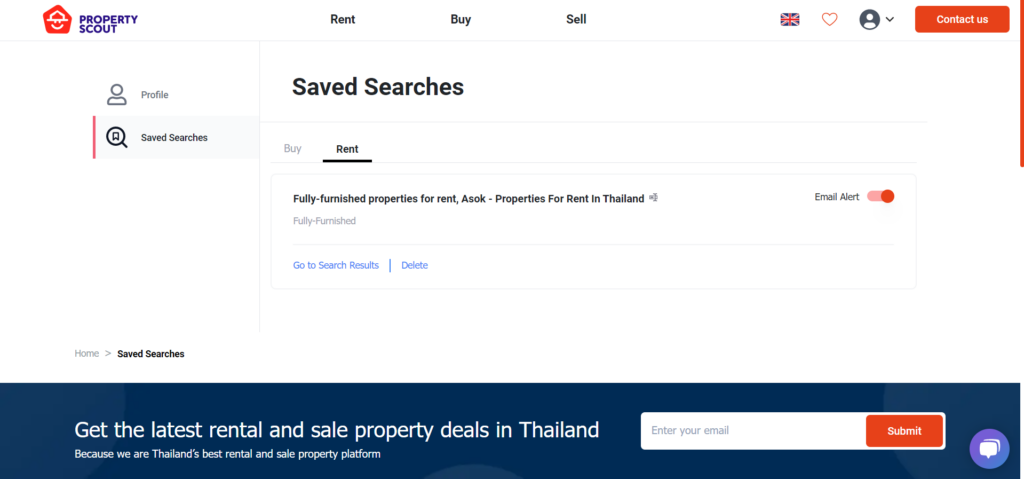
Your saved search results should now show up like this.
Additional features
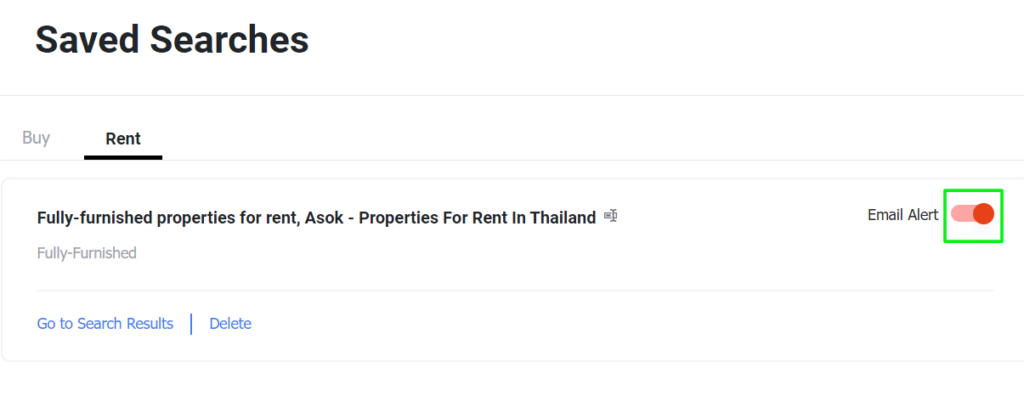
Turning on email notifications on your saved search results will notify you of new additions to your search results (Top 20 matching results maximum, will be updated every 24 hours unless there no updates in any day; varies).
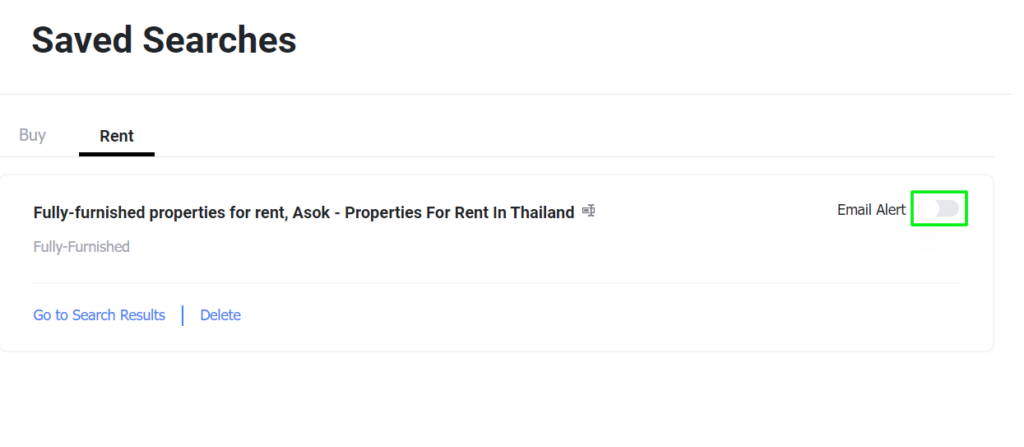
However, if you do not wish to be notified of new additions by email, you can choose to turn off email notifications by pressing again to disable email notifications.
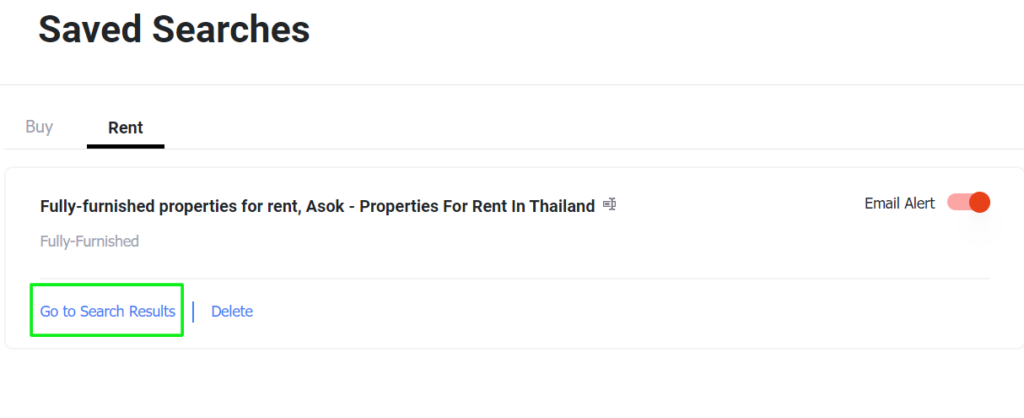
Click "Go to Search Results" to see your complete search results in detail.
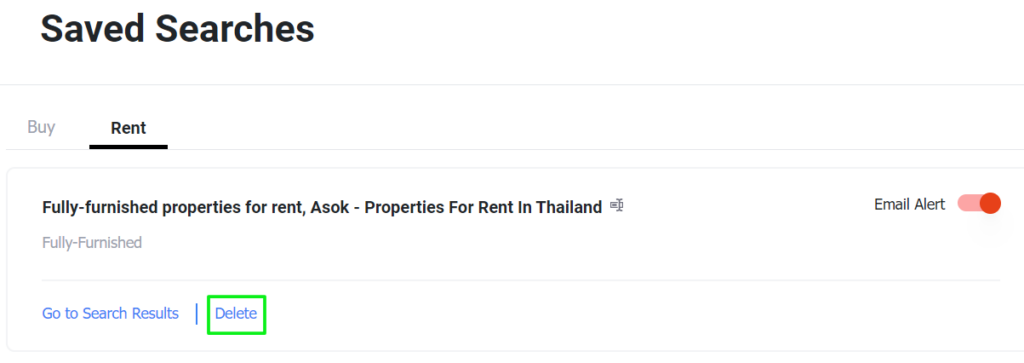
Alternatively, if you no longer wish to be notified of further additions to your search results, you can click "Delete" to permanently delete your saved search result.
Note that the same rules for these steps also apply for searching for properties for SALE.
Conclusion
We hope you found this tutorial on how to save your search queries and results useful. With this feature, you will surely never forget what you want to search for every again and the ability to enable email notifications of property additions is nothing short of icing on a cake. In the meantime, let us know what you think in the comments below and thank you for reading!


